
In This Post I Am Going To Show You How To Add Stylish Author Box In Blogger Site. I Will Show How To Add A Stylish Author Box Through An HTML. We Will See The Importance And Features Of The Author Box. You Must Follow The Steps One By One And In A Manner To Add A Stylish Author Box In Your Blog. So Let’s Start,
What Is An Author Box?
An Author Box Is A Brief Section Typically Found At The End Of An Article Or Blog Post. It Provides A Snapshot Of The Author, Offering Readers A Glimpse Into Their Background, Expertise, And Sometimes Even A Touch Of Personality.
Why Should I Add Author Box?
The Author Box Is Important In A Website As It:
- Building Trust: Readers Are More Likely To Trust Content When They Know There’s A Real Person Behind It. An Author Box Adds A Human Touch, Establishing A Sense Of Trust And Credibility.
- Establishing Authority: Knowing The Author’s Background Or Expertise Lends Weight To Their Words. It Helps Establish The Author As A Knowledgeable And Reliable Source In Their Field.
- Fostering Connection: Reading Becomes A Two-way Street With An Author Box. Readers Can Connect With The Author, Share Thoughts, And Even Follow Them On Social Media For More Insights.
How To Add Author Box In Your Blog?
Follow The Below Steps One By One To Add Author Box In Your Blog. These Steps Must Be Followed In The Manner Or Otherwise Can Not Be Completed.
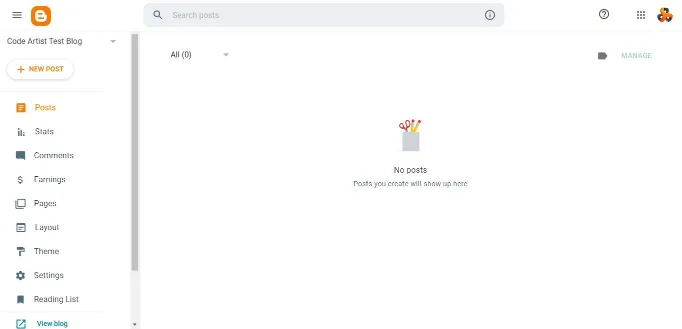
- Step 1: First Of All Go To The Blogger And Login In To The Blogger Dashboard.
- Step 2: Now Go To The Layout Section And Search For “Add New HTML Widget“.
- Step 3: Click On The “Add New HTML Widget” And Paste The Below Code.

<div class="aboutAuthor">
    <div class="K2_bio">
      <img alt="About The Code Artist" src="https://blogger.googleusercontent.com/img/a/AVvXsEgWbMp_6DTx-j9wlpuj858lpEqzkizVHK6VDvhHG1WIX_6DxXjcIeeJ0I4Oqe3JLyn8qVGMUb4ZF_dSU06cz-EQnD6_yb15zWaselHSjH9vTLEAIVKUgoPAeNIN0SF6P0wavViVZhix2ZU7phNgBeR9HLgEGzDAe1hSPfKOFKOZimT6JrjAxa3IUjGb">

      <h2> About The Code Artist </h2>
      <p> Lorem ipsum dolor sit amet, consectetur adipiscing elit. Mauris pretium augue non orci pharetra, eget dictum ante sagittis. Suspendisse eu nibh justo. Cras scelerisque urna lectus. Praesent rhoncus ut risus quis convallis. Praesent nec lorem eros.</p>

      <div class="k2About-bt">
        <a class="button" href="#"><svg class="K2svg" viewBox="0 0 32 32" xmlns="http://www.w3.org/2000/svg"><g><path d="M28.59,4.29a2.23,2.23,0,0,0-2.27-.36L3.41,13.1a1.83,1.83,0,0,0,0,3.38l1.48.61a1,1,0,0,0,1.31-.53,1,1,0,0,0-.54-1.31L4.56,14.8l22.51-9a.22.22,0,0,1,.23,0,.24.24,0,0,1,.08.23L23.27,25.21a.4.4,0,0,1-.26.3.39.39,0,0,1-.39-.06l-8-6.24,7.83-7.91a1,1,0,0,0-1.22-1.56L9.75,16.54a1,1,0,1,0,1,1.72l4.83-2.85L13.23,17.8a2,2,0,0,0,.2,3.08l8,6.15a2.4,2.4,0,0,0,1.47.5,2.47,2.47,0,0,0,.83-.15,2.37,2.37,0,0,0,1.52-1.75L29.33,6.47A2.23,2.23,0,0,0,28.59,4.29Z"></path></g></svg> Join the Community</a>
      </div>
    </div>
  </div>
  <style>
  .aboutAuthor {
      padding: 60px 0 20px 0;
  }
  .aboutAuthor .K2_bio {
      justify-content: center;
      position: relative;
      display: flex;
      flex-direction: column;
      justify-content: center;
      align-content: center;
      align-items: center;
      max-width: 95%;
      margin: auto;
      padding: 80px 15px 65px 15px;
      /*background-color: #FFF;*/
      box-shadow: 0 10px 40px rgba(149,157,165,.2);
      border-radius: 20px;
      border: 5px solid #404040;
  }
  .aboutAuthor .K2_bio img {
      background-image: linear-gradient(to top right,#ffffff,#ffa24d);
      box-shadow: 0 5px 20px rgba(0,0,0,.2);
      padding: 0;
      border: 7px solid #ffc2b4;
      width: 120px;
      height: 120px;
      position: absolute;
      border-radius: 50%;
      top: -60px;
      pointer-events: none;

  }
     .aboutAuthor .K2_bio h2{
    margin:0px!important;
      padding: 0;
    }
  .aboutAuthor .K2_bio p {
      margin: 1em 0!important;
      text-align: center;
  }
  .aboutAuthor .K2_bio .k2About-bt {
      text-align: center;
      position: absolute;
      bottom: 0;
      left: 0;
      right: 0;
  }
  .k2About-bt svg  {
      width: 22px;
      height: 22px;
      fill: #FFF;
    margin-right:3px;
  }
   .darkmoade .aboutAuthor .K2_bio {
    background-color: var(--dark-bgAlt);
    }
</style> Note: Change The Data Of Line Number: 3,5,6 With Your Own Data And Also Add Links In Buttons (Line Number: 9)
- Step 4: Now Click On Save And Check Your Website.
We Have Successfully Installed An Author Box In Blog. If You Encountered Any Error While Adding This In Your Blog You Can Comment In The Section Below. I Will Try My Best To Resolve It. Thanks For Reading.
Also Read: How To Create And Add Privacy Policy Page In Your Website.
Conclusion:
The Author Box Is More Than Just A Sign-Off; It’s An Essential Bridge Between Creators And Consumers Of Content. So, The Next Time You Finish An Engaging Article, Take A Moment To Scroll Down And Meet The Mind Behind The Words In The Author Box. It’s A Digital Handshake, A Brief Introduction That Transforms A Name On A Screen Into A Relatable, Real-Life Storyteller.
Frequently Asked Questions:
It Is A Friendly Note At The End Of A Blog Post That Introduces The Person Who Wrote It. It Usually Has The Writer’s Name, A Short Description, And Sometimes Even Their Picture.
It Makes Your Blog Feel More Personal. It Helps Readers Connect With The Person Behind The Words, Building Trust And Making Your Blog More Interesting.
It Depends On What Platform You’re Using. Many Platforms, Like WordPress, Have An Option To Add An Author Box. You Can Also Use Special Tools Or Code To Add One.